

6/10
Difficulty 3
Playthroughs 30
Hours
Difficulty 3
Playthroughs 30
Hours
Roadmap
Stage 1: The Squire or The Knight
For this step, you will want to play through the entire game on either Squire (Easy) or Knight (Normal) difficulty. This will net you most of the trophies and a lot of the items. If you find Knight difficulty too hard, you can lower the difficulty to Squire to get the Spells and Equipment, and then play the higher difficulty using the Episode Select option.This will familiarize you with the mechanics and the gameplay to get ready for the higher difficulties that are coming in the next steps. You will earn most of the trophies in this stage as well, minus a few that you might need to grind for.

Defeat the witch Straeggele
Defeat the witch Trude
Defeat the witch Holda
Force Faust to retreat
Defeat the witch Trendula
Defeat the witch Rapunzel
Defeat the witch Verderinde
Defeat Faust
Defeat your true enemy
Beat the game on Page
Beat the game on Squire
Acquire the Scythe of the Assassin Queen
Acquire the Scythe of Imperial Massacre
Collect 10,000 souls

Collect 100,000 souls
Attain the highest possible combo rating
Perform a 30-hit combo
Perform 10 counterattacks while taking enemy attacks
Catch and defeat five enemies at once with Mag Mell's Rose
Collect 100 Recovery Items
Defeat 50 enemies with the help of Minukelsus
Upgrade a Witchcraft
Acquire all equipment
Acquire a collection item
Defeat an enemy
Defeat 100 enemies
Defeat 1,000 enemies
Land a Finisher
Land 100 Finishers
Land 100 Perfect Finishers
Bash the same enemy into a wall five times
Pick up the same enemy five times
Repel an enemy's attack 10 times
Experience your first revival
Save Gretchen from enemy attack
Use Witch's Embrace when no enemies are present
Stage 2: Spirit Gun?
Now that you have Chapter select, you will want to go back through one of the difficulties, Squire will make this easier. The goal is to get an overall rank of "S"; you do not need "S+". This will unlock the ultimate Magic spell, which can make the later difficulties easier.If you can, grab any missing items for the equipment and collections as well. This has to be done on Squire difficulty or higher. Just run an Episode with a rank lower than "A" and get a better grade to boost your overall rank. Now if you are playing an EU copy you will need to get S ranks in all 20 stages for this one.
This step can be used to collect everything in the game outside of the difficulty trophies, as you have to unlock Hexen (complete the game) and Witchslayer (complete Hexen).

Acquire Spirit Cannon
Acquire all Witchcraft
Acquire all equipment
Acquire all collection items
Stage 3: The Hexen Knight
This will be a fairly quick run if you have already collected all the items and magics already. There are some points that can be really tough, mainly the 4 Witch Enclosures and Episode 19's QTE. With all the spells and items, your Magic will be refilling very fast and the bosses will fall very quickly to your power.
Beat the game on Knight
Beat the game on Hexen Knight
Stage 4: Becoming Legendary
At this point, you should have all other trophies done; you should have max magic powers, every item, and every piece of equipment. Even on this difficulty, most enemies and bosses will fall quickly to your overwhelming power. The biggest hurdles are going to be the Witch Enclosure Episodes, the Shadow Heinrich fight, and the Final Faust QTE. Outside of those few things, this difficulty is not that much harder than Hexen.Enemies can "devil trigger" if they are not killed fast enough, though your magic powers should help circumvent that. Between Spirit Cannon and your other magic, most enemies can be dealt with quickly with little issues.
Save your Witch's Embrace for those tough situations, especially in the 2 Witch Enclosures as Gretchen. Once you reach Episode 20, this is pretty much a done deal, as the final boss is not nearly as hard as the rest of the game.

Fully execute your Knights Contract
Beat the game on Witchslayer
Tips & Strategies
Control Setup
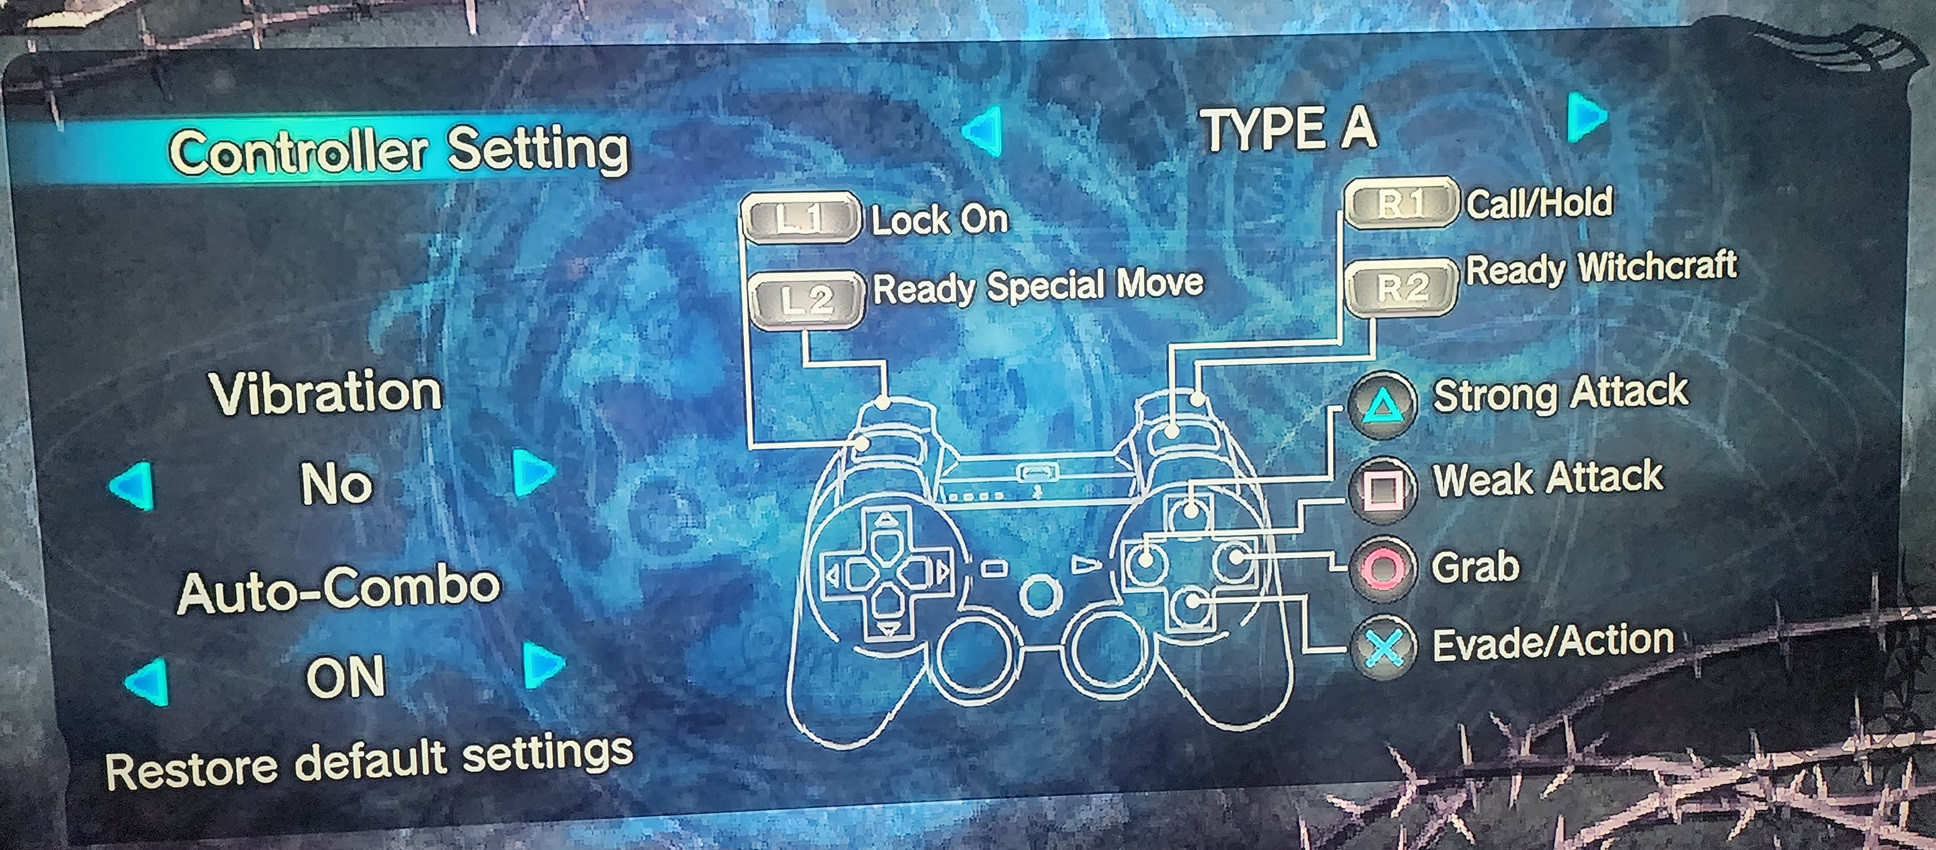
You will unlock the Chapter Select after completing Episode 1. You will be able to select the most recent unlocked episode. This means that you will be able to collect anything you missed out on. With the Episode Select nothing is missable as well so you can play at your own pace to get everything.
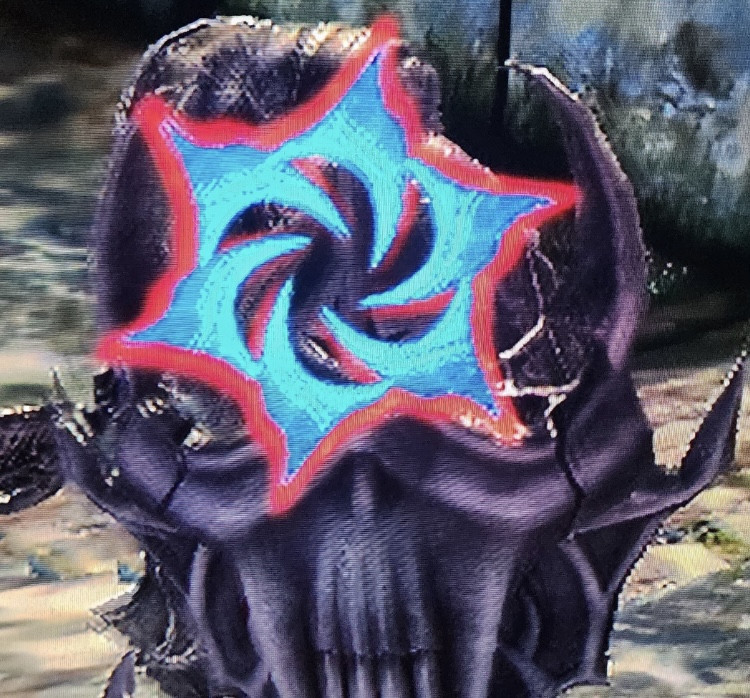
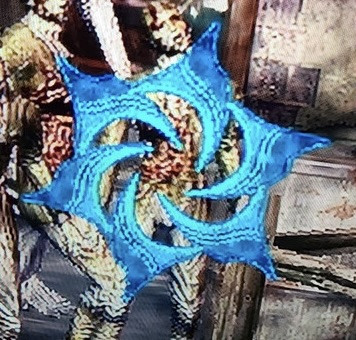
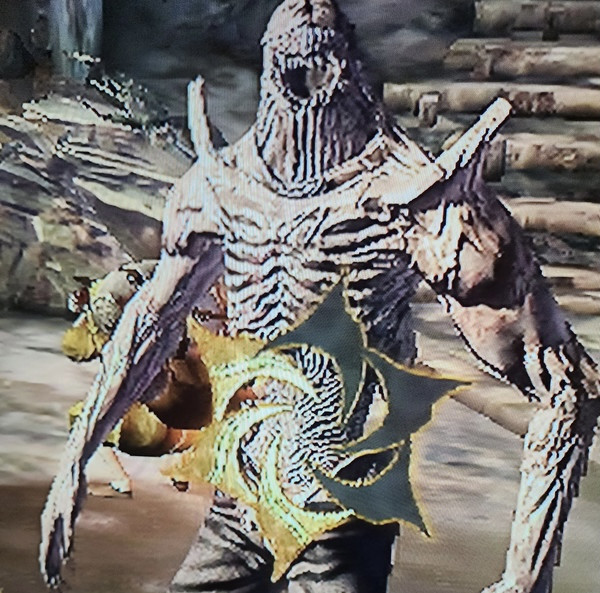
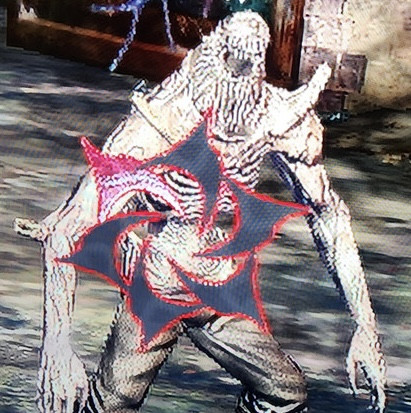
 . This does use her witch points, though., you can see their health bar. If an enemy has some kind of shield it usually has a red barrier around the health bar, this will will remain after breaking the shield. An enemy in yellow or red health can usually be 1-HKOed by a finisher.
| Shielded Health | Full Health | Half Health | Near Death |
|---|---|---|---|
 |  |  |  |
All QTEs
All credit for the video goes to shoe478.

|
Supreme Witchslayer Fully execute your Knights Contract |
|
|

|
Bone Collector Defeat the witch Straeggele |
|
|
You will have to fight the Witch Straeggele twice. The first time you fight her she will be in her humanoid form, at the end of Episode 1: Death-Ridden Town. Here, you are on the roof of a house and she can knock you off leaving Gretchen up there with her. If you are knocked off, you will be surrounded by several Armored Knights. You can avoid them and climb back up. Straeggele has a move where she shoots out her rib cage, which has 2 effects: it will knock Heinrich away, and it will grab Gretchen. If she grabs Gretchen, just attack her until she drops her. Straeggele can also drop mines that will damage you if you step on them; these are easy to avoid and glow red. Straeggele will also move to a different roof, and then she will do a charge attack, doing 2-3 charges each time.
Once you beat her, she will run away and you will have fight her in the next area, Episode 2: The Knight's Contract. This episode will open with you having to run away from her monstrous form before having to fight her. You will have to keep running to avoid Straeggele and watch out for the magic spears that will come out from the left and right. In the second section, there will be small fire spots. You can avoid these by moving to the left or right. After you run through the entire gauntlet, you will enter the arena where the fight will begin.
Straeggele will be in her beast form and this time she will not run. She has a charge attack where she will glow red, which can knock you down if you are in the path, on top of the damage that you will receive. When she jumps to a rooftop, she will breath a large stream of fire; just move away from her and you should be able to avoid this. She has basic melee attacks, and she can grab Gretchen to drain her health. Eventually, she will jump to the clock tower. She will then blast a breath of fire down the center of the screen. When she jumps down from a rooftop, she will create a shockwave. She can also slam her claws and create spikes from the ground. You can attack either her claws or her head, and once you drain all of her health, you will have to do a QTE. If you fail the QTE, you will die and be sent to the previous checkpoint, when she was on the clock tower. After the QTE the battle will end and this one will pop.
Once you beat her, she will run away and you will have fight her in the next area, Episode 2: The Knight's Contract. This episode will open with you having to run away from her monstrous form before having to fight her. You will have to keep running to avoid Straeggele and watch out for the magic spears that will come out from the left and right. In the second section, there will be small fire spots. You can avoid these by moving to the left or right. After you run through the entire gauntlet, you will enter the arena where the fight will begin.
Straeggele will be in her beast form and this time she will not run. She has a charge attack where she will glow red, which can knock you down if you are in the path, on top of the damage that you will receive. When she jumps to a rooftop, she will breath a large stream of fire; just move away from her and you should be able to avoid this. She has basic melee attacks, and she can grab Gretchen to drain her health. Eventually, she will jump to the clock tower. She will then blast a breath of fire down the center of the screen. When she jumps down from a rooftop, she will create a shockwave. She can also slam her claws and create spikes from the ground. You can attack either her claws or her head, and once you drain all of her health, you will have to do a QTE. If you fail the QTE, you will die and be sent to the previous checkpoint, when she was on the clock tower. After the QTE the battle will end and this one will pop.
QTE:  , ,  , , , ,  , ,  (mash) (mash) |

|
Ice Breaker Defeat the witch Trude |
|
|
This is the second boss found in Episode 2: The Serpent's Den. She resides deep inside the snow-covered mountain, Trude will have the 2 snakes at her side that attacked you earlier in the stage. The snakes can grab you and do constant damage until you get out of their mouths. You will need to damage both snakes until Trude comes into range of your attacks. Once she is in range, hit her with everything (magic and melee). If you load in to her fast enough, you can easily get the 30 hit combo here for  The Sonic Knight. Trude will summon large chunks of ice to fall from above. The snakes also have an ice breath similar to Straeggele's fire breath. Additionally, the 2 snakes will keep resurrecting until Trude is defeated.
The Sonic Knight. Trude will summon large chunks of ice to fall from above. The snakes also have an ice breath similar to Straeggele's fire breath. Additionally, the 2 snakes will keep resurrecting until Trude is defeated.QTE:  , , , ,  (mash), (mash),  |

|
Fire Fighter Defeat the witch Holda |
|
|
This is the boss of Episode 7: The Burning Tyrant. This fight can be a major roadblock for most players. She can be incredibly dangerous and this is possibly the hardest boss fight in the game. This is due to the second part of the fight you are on a small platform and she can knock you off from it. Before fighting Holda, you will have to climb the tower. As you climb you will see a platform with the "Seal of Life", which is needed for The Finer Things.
Once you reach the top, you will face Holda on the tower roof. She will be in a chariot of fire and fly around the arena. She has a charge attack that can set you on fire. She will also fire a multi-blast of fire spears, so stay on the move and carry Gretchen when you can to keep your health up. She can also use the wheels as a shield that will also damage you when she is stationary. If you go up high, try to get to the edge of the arena, as she will be doing a massive slam attack.
Once you take down her health bar, the fight will switch to inside the tower, and you will be on the platform that had the Seal of Life earlier. She also loses the chariot and will be using one of the wheels as a shield. Since she likes to keep her distance, it is best to use Enoch's Hammer and Maar's Lance, preferably both at level 2.
Here, if you get knocked off the edge, you will die. Holda will jump off of the platform and throw her spear, doing a lot of damage, and will fling you out of the arena. She can create bursts of lava from the platform as well. Most of her attacks can also send Heinrich flying off the platform. If she impales Heinrich, you will need to press repeatedly to break free or be thrown off the platform. Sometimes she will hold up the shield and be bathed in flames, she will jab with the spear doing massive damage.
Stay on the move and try to stay near the center to avoid being launched off the platform. The sooner you take her down, the safer you will be. Just do not get greedy with your attacks. Try to have your most used spells at level 2 for the best effect. Once you drain all her health the second time, you will have to complete a QTE before you can rest.
The Finer Things.Once you reach the top, you will face Holda on the tower roof. She will be in a chariot of fire and fly around the arena. She has a charge attack that can set you on fire. She will also fire a multi-blast of fire spears, so stay on the move and carry Gretchen when you can to keep your health up. She can also use the wheels as a shield that will also damage you when she is stationary. If you go up high, try to get to the edge of the arena, as she will be doing a massive slam attack.
Once you take down her health bar, the fight will switch to inside the tower, and you will be on the platform that had the Seal of Life earlier. She also loses the chariot and will be using one of the wheels as a shield. Since she likes to keep her distance, it is best to use Enoch's Hammer and Maar's Lance, preferably both at level 2.
Here, if you get knocked off the edge, you will die. Holda will jump off of the platform and throw her spear, doing a lot of damage, and will fling you out of the arena. She can create bursts of lava from the platform as well. Most of her attacks can also send Heinrich flying off the platform. If she impales Heinrich, you will need to press
repeatedly to break free or be thrown off the platform. Sometimes she will hold up the shield and be bathed in flames, she will jab with the spear doing massive damage.Stay on the move and try to stay near the center to avoid being launched off the platform. The sooner you take her down, the safer you will be. Just do not get greedy with your attacks. Try to have your most used spells at level 2 for the best effect. Once you drain all her health the second time, you will have to complete a QTE before you can rest.
QTE: ,  , ,  , , (mash), , , (mash), |

|
Until Next Time... Force Faust to retreat |
|
|
This fight will happen in the episode immediately after fighting Holda, and he is far easier to fight. First, you will have to fight through two waves of enemies. Destroy the moster generators to stop the monsters from spawning.
Once the fight with Faust starts, he will be using a sword, and he dodges a lot. After a while, Faust will use magic to create 2 clones of himself; while they have less health, they are still powerful. Once you defeat those clones, Faust will summon 4 more clones. Faust only uses melee attacks with his sword, and you are in a confined space. Once you drain his health, he will leave the fight, and you will head to the next Witch Hunt. Breathe easy as well, as there are no QTE's on this fight.
Once the fight with Faust starts, he will be using a sword, and he dodges a lot. After a while, Faust will use magic to create 2 clones of himself; while they have less health, they are still powerful. Once you defeat those clones, Faust will summon 4 more clones. Faust only uses melee attacks with his sword, and you are in a confined space. Once you drain his health, he will leave the fight, and you will head to the next Witch Hunt. Breathe easy as well, as there are no QTE's on this fight.

|
Storm Stopper Defeat the witch Trendula |
|
|
The first time you fight Trendula, you will be on a balcony. Trendula will slam her fist down for massive damage or she will summon lightning. The lightning will create a small pillar before it hits making it easy to avoid. You will have to attack her hands until you drain her health to end this fight.
Afterwards, you will have to climb the tower before you can finish the fight. Once you reach the top of the tower, you will meet Trendula on the narrow walkways.
This time around, you will want to have Enoch's Hammer and Maar's Lance equipped for the fight. Also, equip both level 1 and level 2 of both spells to maximize damage output. Trendula has the same lightning attack from the first round, so watch for the light blue pillars. She will still try to smash you with her fist as well, and she rip the bridges out, limiting your area of movement. She has 1 more attack to watch out for, she will create a large vortex in her body then blast it out at you this attack can knock you of the bridges. You can try to stay near the towers as they can prevent being knocked off the bridges sometimes. Also, if you have the Witch points for it, use Witch's Embrace to do a lot of damage to shorten the fight.
Afterwards, you will have to climb the tower before you can finish the fight. Once you reach the top of the tower, you will meet Trendula on the narrow walkways.
This time around, you will want to have Enoch's Hammer and Maar's Lance equipped for the fight. Also, equip both level 1 and level 2 of both spells to maximize damage output. Trendula has the same lightning attack from the first round, so watch for the light blue pillars. She will still try to smash you with her fist as well, and she rip the bridges out, limiting your area of movement. She has 1 more attack to watch out for, she will create a large vortex in her body then blast it out at you this attack can knock you of the bridges. You can try to stay near the towers as they can prevent being knocked off the bridges sometimes. Also, if you have the Witch points for it, use Witch's Embrace to do a lot of damage to shorten the fight.
| QTE: , , , , mash |

|
Hair Cutter Defeat the witch Rapunzel |
|
|
Rapunzel is possibly the easiest boss out of the Witches in the game, she transforms into a large spider made of her hair. She can summon small spiders to attack, and she "sings", which prevents the use of magic. She can also use her hair to tangle up Heinrich. This requires a QTE to be able to escape without damage. She also has melee attacks using her legs. Sometimes she will raise her abdomen and slam it back down, this will create a shield of hair spikes. Using Maar's Lance 2 and Enoch's Hammer 2 can do massive damage to her as well. She wil probably go down pretty fast on any difficulty, though she does love to move around.
| QTE: , , , , |

|
Stone Crusher Defeat the witch Verderinde |
|
|
You will fight Verderinde in Episode 16 after completing both of the Witch's Enclosures. She can fire lightning across the arena and She has a slam attack, as she likes to stay in the air quite a bit; this will cause an area-effect explosion. She can use her staff for a basic melee attack. She can spin her wings around her like a buzzsaw as well; they start to glow red before spinning.
Using spells like Enoch's Hammer and Maar's Lance will be your best attacks to try and ground her, then hit her with everything else. She is a glass cannon with high damage and low defense, so if you can get her on the ground, she should go down fast.
Using spells like Enoch's Hammer and Maar's Lance will be your best attacks to try and ground her, then hit her with everything else. She is a glass cannon with high damage and low defense, so if you can get her on the ground, she should go down fast.
| QTE: , , (mash), |

|
To the Fires of Hell Defeat Faust |
|
|
The first round will be Faust in his human form with a sword. He has the basic melee with his sword, and he can also create a large ball of energy. You can stop him from using this attack if you damage him quickly enough. He will summon clones of himself just like before after so much damage. He can also create a barrier around himself, though it does not last very long. He also has a jump attack that is easy to dodge.
After beating the human form, he will transform. This guy is huge, but do not let that fool you. Outside of his QTE, he is fairly easy to beat, especially when you have all the abilities available. His QTE however is the worst in the highest difficulties, as the QTE window is so small that you almost have to be pre-cognitive.
Now for the boss himself, he will try to stomp you with his large claws. He does not really have many moves this round, as it is mainly just him trying to melee you.
This time, he will create a large trident staff that he will try to melee you with. He can summon a large ball of light that will then rain down on you. Luckily, this stays in one spot when, so if you keep moving, you will avoid it easily. He will also jump every now and then, trying to land on you. When he does land, he will slam his trident, creating a cross-shaped blast. He can also create barriers around his legs, when he does this it is usually only on one side.
Just lay into this guy with your strongest attacks and melee when magic is recharging.
After beating the human form, he will transform. This guy is huge, but do not let that fool you. Outside of his QTE, he is fairly easy to beat, especially when you have all the abilities available. His QTE however is the worst in the highest difficulties, as the QTE window is so small that you almost have to be pre-cognitive.
Now for the boss himself, he will try to stomp you with his large claws. He does not really have many moves this round, as it is mainly just him trying to melee you.
This time, he will create a large trident staff that he will try to melee you with. He can summon a large ball of light that will then rain down on you. Luckily, this stays in one spot when, so if you keep moving, you will avoid it easily. He will also jump every now and then, trying to land on you. When he does land, he will slam his trident, creating a cross-shaped blast. He can also create barriers around his legs, when he does this it is usually only on one side.
Just lay into this guy with your strongest attacks and melee when magic is recharging.
| QTE 1: , |
| QTE 2: , , , , , (mash), |

|
True Peace at Last Defeat your true enemy |
|
|
This is the final battle and it is the only event in Episode 20. This boss is smaller than Faust and she likes to stay in the air, so Enoch's Hammer and Maar's Lance will be your best damage dealers when she is flying. Once she is on the ground use whatever spells you prefer to damage her as fast as possible. After so much damage you will have to do your first QTE, after that you can drain the rest of her health. There is a second QTE once you drain her fully.
In the first round, she has one attack in which she covers a large area with lightning and it can kill you very fast, even on lower difficulties. This attack is done by her dropping a spike into the ground and the lightning snakes out from there. She also has a charge attack in which she is engulfed in energy and she can summon a group of swords, like her "wings" from the previous fight. She will launch all of these at you, so keep moving.
After the first QTE you will now have a time limit to defeat her. She can now summon a meteor to slam down, and it has an area-of-effect blast as well, so it can be hard to dodge. She does move a bit faster though but she can also has lower defense as well. She does retain all her moves from the previous round as well.
Another boss that likes to stay up in the air so use Maar's Lance and Enoch's Hammer to try and get her to your level. Once she is grounded, hit her with everything you have.
In the first round, she has one attack in which she covers a large area with lightning and it can kill you very fast, even on lower difficulties. This attack is done by her dropping a spike into the ground and the lightning snakes out from there. She also has a charge attack in which she is engulfed in energy and she can summon a group of swords, like her "wings" from the previous fight. She will launch all of these at you, so keep moving.
After the first QTE you will now have a time limit to defeat her. She can now summon a meteor to slam down, and it has an area-of-effect blast as well, so it can be hard to dodge. She does move a bit faster though but she can also has lower defense as well. She does retain all her moves from the previous round as well.
Another boss that likes to stay up in the air so use Maar's Lance and Enoch's Hammer to try and get her to your level. Once she is grounded, hit her with everything you have.
| QTE 1: (mash), , |
| QTE 2: , , , |

|
Novice Executioner Beat the game on Page |
|
|
This is the equivalent of very easy mode, so the enemies die much faster, and you take less damage. Beating the game on Squire ( Average Executioner) or on Knight ( Skilled Executioner) will also unlock this trophy.
This difficulty will not unlock Hexen Knight or the Spirit Cannon, so unless you want to do an extra play-through, this difficulty can be skipped. However, if you want an easier time getting everything else in the game, you can start here and blast through the rest of the difficulties rather quickly, using everything you have already unlocked.
Average Executioner) or on Knight ( Skilled Executioner) will also unlock this trophy.This difficulty will not unlock Hexen Knight or the Spirit Cannon, so unless you want to do an extra play-through, this difficulty can be skipped. However, if you want an easier time getting everything else in the game, you can start here and blast through the rest of the difficulties rather quickly, using everything you have already unlocked.

|
Average Executioner Beat the game on Squire |
|
|
This difficulty is the equivalent of easy mode, though it can still be pretty tough at some points. This is also the lowest difficulty that can be used to unlock the Spirit Cannon. Beating the game on Knight ( Skilled Executioner) will also unlock this trophy.
Beating the game on Squire will also award you the trophy for beating it on the lowest setting: Novice Executioner (Page). By beating the game on Squire (or Knight), you will unlock Hexen Knight. For more details on this difficulty, refer to  Master Executioner.
Skilled Executioner) will also unlock this trophy.Beating the game on Squire will also award you the trophy for beating it on the lowest setting:
Novice Executioner (Page). By beating the game on Squire (or Knight), you will unlock Hexen Knight. For more details on this difficulty, refer to Master Executioner.

|
Skilled Executioner Beat the game on Knight |
|
|
This difficulty is the equivalent of Normal mode. Along with Page and Squire, they are the difficulties available right from the start. Beating the game in this difficulty will also award you the trophies for beating it on the two lower settings: Novice Executioner (Page) and Average Executioner (Squire). Beating the game on either Knight or Squire difficulties will unlock Hexen Knight. For more details on this difficulty, refer to Master Executioner.
Novice Executioner (Page) and Average Executioner (Squire). Beating the game on either Knight or Squire difficulties will unlock Hexen Knight. For more details on this difficulty, refer to Master Executioner.

|
Master Executioner Beat the game on Hexen Knight |
|
|
This difficulty is the equivalent of Hard mode and must be unlocked by completing the game once on either Knight ( Skilled Executioner) or Squire ( Average Executioner). Once you beat the game on Hexen Knight, you will unlock Witchslayer for more details, please refer to  Legendary Executioner.
Skilled Executioner) or Squire ( Average Executioner). Once you beat the game on Hexen Knight, you will unlock Witchslayer for more details, please refer to Legendary Executioner.

|
Legendary Executioner Beat the game on Witchslayer |
|
|
The Witchslayer difficulty must be unlocked by completing the game on Hexen Knight. This is equivalent to Very Hard, and the QTE timing is so strict you almost have to be pre-emptive to get them. Outside of the QTEs, this mode is not too much harder than the previous difficulty, and by now, you should have the Spirit Cannon. The Spirit Cannon can make short work of most bosses, but it is slow to aim and fire.
Do not worry about style only speed, kill the enemies as fast as possible. Between your Magic powers, equipment, and stats, you should be able to get through most of the fights pretty quickly. The hardest part of this entire difficulty will be the QTE in the Faust fight near the end of the game. Maar's Lance is a very good magic to use, as it is powerful and charges pretty quickly. Also equip the 2 items that will boost your Magic Regen, this will boost your damage output as you will be able to use the magic more often.
Also, note that it can be hard to get Heinrich back up from "death" if you have a turbo controller that can save your fingers, though it is not required.
Do not worry about style only speed, kill the enemies as fast as possible. Between your Magic powers, equipment, and stats, you should be able to get through most of the fights pretty quickly. The hardest part of this entire difficulty will be the QTE in the Faust fight near the end of the game. Maar's Lance is a very good magic to use, as it is powerful and charges pretty quickly. Also equip the 2 items that will boost your Magic Regen, this will boost your damage output as you will be able to use the magic more often.
Also, note that it can be hard to get Heinrich back up from "death" if you have a turbo controller that can save your fingers, though it is not required.

|
The Witch's Ultimate Weapon Acquire Spirit Cannon |
|
|
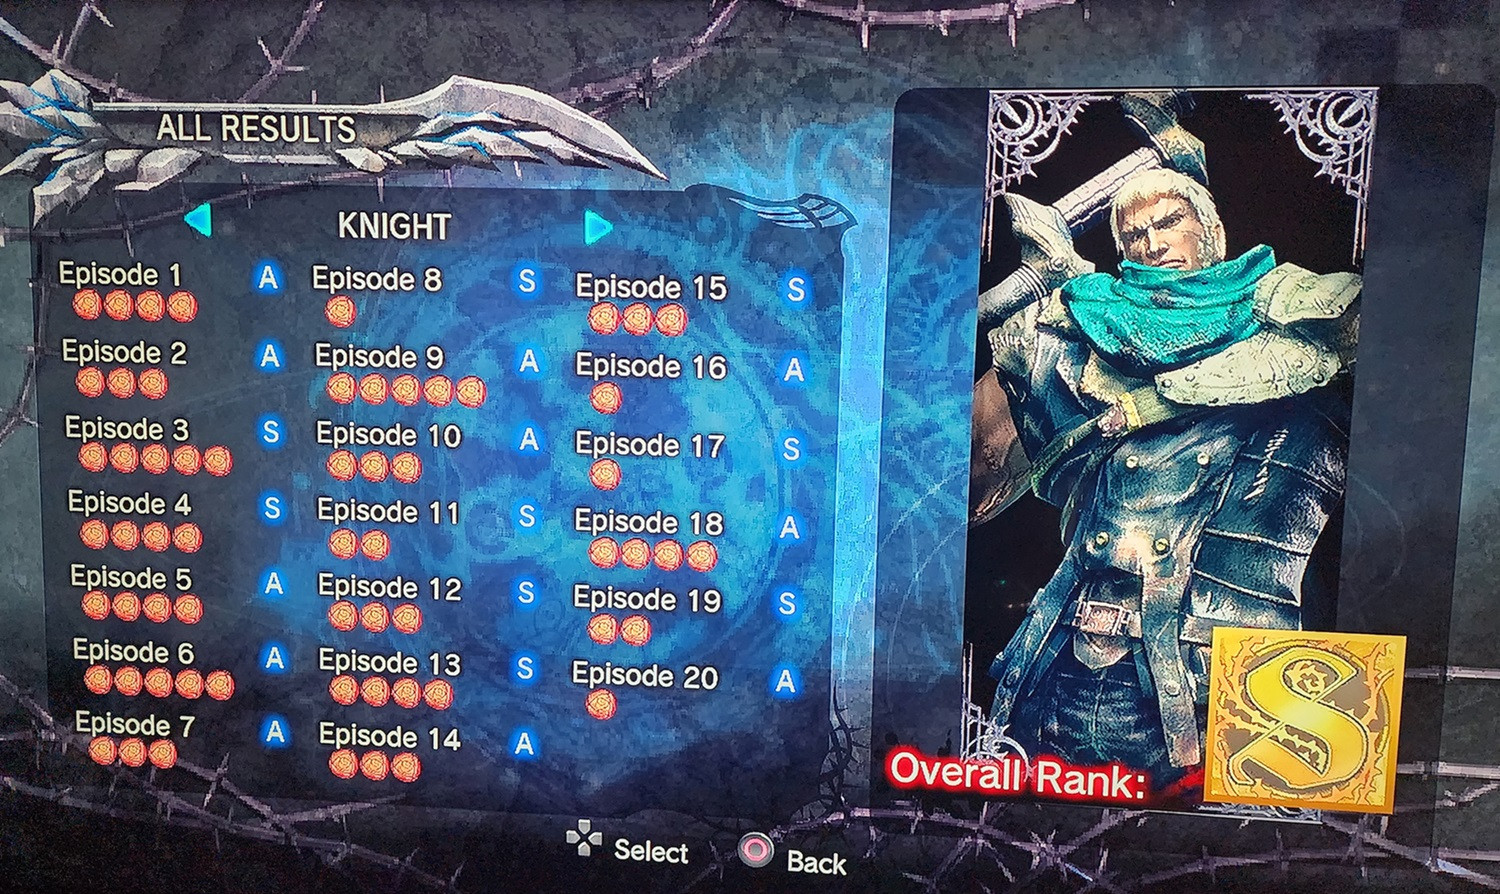
In order to acquire the Spirit Cannon, you will need to get an overall rank of S for 1 entire difficulty. Squire is the lowest difficulty this can be done on and it can be done using Episode select. Once you have all the abilities and equipment, you can replay the Episodes focusing on taking out the enemies and bosses faster and as stylishly as possible. Your Rank is based on Time, Combos, Finishers, Kills, and Retries.
Here is a shot showing what kind of ranks you can get and still get the S rank. Not every Episode has to be an S rank for your overall rank to equal S. As seen in the picture below, you can get 9 Episode S ranks and 11 Episode A ranks and still get the S.
Once you have an overall S rank on any difficulty, you will need to replay Episode 20 and this will pop after the credits.
NOTE: There seems to be a region difference with this trophy found by Vern3r0z who was unable to get this until S ranking all stages for an S+ rank. My region is US and Vern3r0z is EU.
Once you have an overall S rank on any difficulty, you will need to replay Episode 20 and this will pop after the credits.
NOTE: There seems to be a region difference with this trophy found by Vern3r0z who was unable to get this until S ranking all stages for an S+ rank. My region is US and Vern3r0z is EU.
Overall Results Screen
 |

|
Terror Acquire the Scythe of the Assassin Queen |
|
|
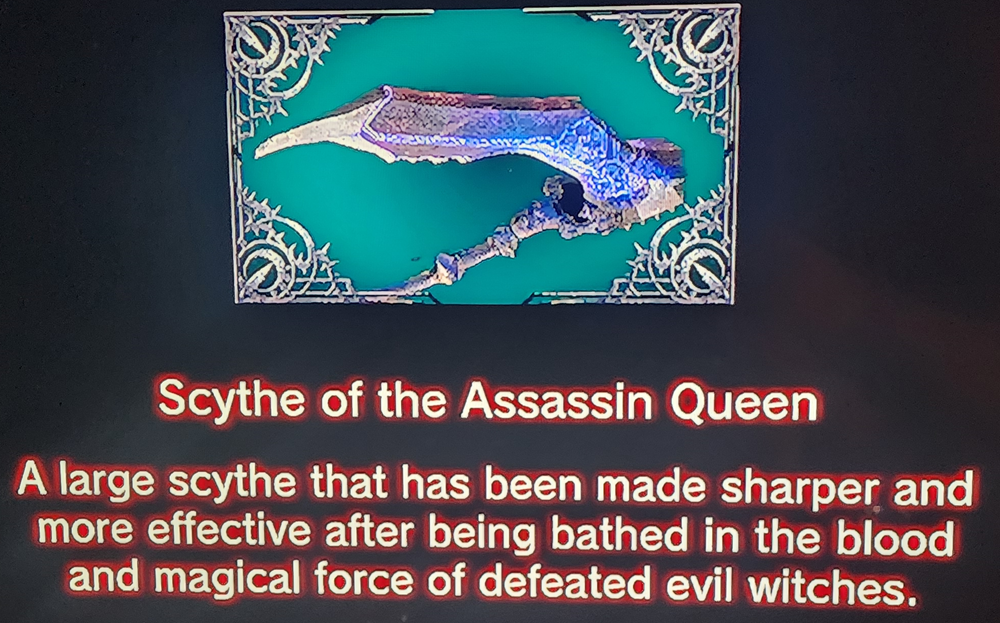
You will gain this scythe after completing episode 5, the battle with Trude. This gives you a slight boost to your strength, about 10%.
 |

|
Fright Acquire the Scythe of Imperial Massacre |
|
|
You will gain this scythe after completing episode 11, the fight with Rapunzel. This will give you an additional boost to your strength, about 15%, on top of the Scythe of the Assassin Queen ( Terror). You will have about a 25% boost overall.
Terror). You will have about a 25% boost overall.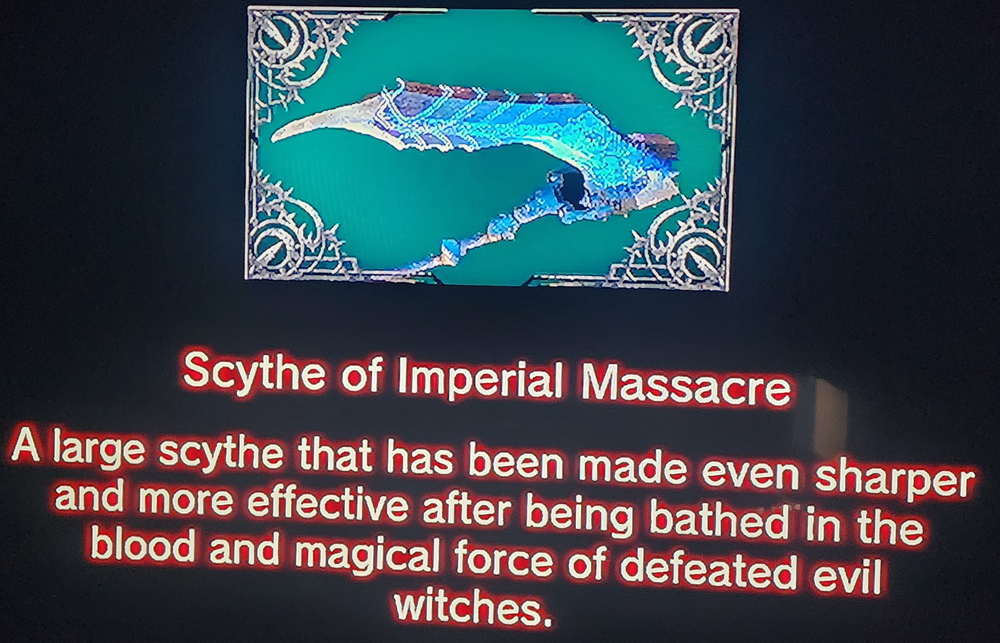 |

|
Soul Grabber Collect 10,000 souls |
|
|
You should reach 10,000 souls naturally around Episode 4. This is cumulative, so you can use the souls on magic spells whenever you have enough for an unlock if you want.

|
Soul Reaper Collect 100,000 souls |
|
|
You might reach this by the end of the first run through the game. If not, then you should get it by the end of one of the other two playthroughs. There is no need to grind for this, though you can equip the Seal of Souls for a small boost to the number of Souls per kill, around 10%. You will need 232,600 souls to max out all your spells, so this will come naturally while you progress towards maxing out your spells.

|
Combo Master Attain the highest possible combo rating |
|
|
This one is much more skill-dependent than The Sonic Knight to do naturally, so it might be harder or easier for you, depending on how much experience you have with Spectacle Fighters. Much like Devil May Cry, you need to reach an S+ Combo. This will require a strong enemy that can take a lot of punishment, several magic spells, and lots of physical attacks. This is best done against later enemies when you have more magic options. Use the lower-level spells to keep the enemy alive. You must reach S+ without getting hit, or the combo meter will reset.
However, there is a super easy way to get an S+ rank in Episode 6. After cooling the lava to reach the tower, enter the sewers; this is the same location where you get the equipment. When you meet several homonculus, use Mags Mell III, and your combo should shoot straight up to S+.
The Sonic Knight to do naturally, so it might be harder or easier for you, depending on how much experience you have with Spectacle Fighters. Much like Devil May Cry, you need to reach an S+ Combo. This will require a strong enemy that can take a lot of punishment, several magic spells, and lots of physical attacks. This is best done against later enemies when you have more magic options. Use the lower-level spells to keep the enemy alive. You must reach S+ without getting hit, or the combo meter will reset.However, there is a super easy way to get an S+ rank in Episode 6. After cooling the lava to reach the tower, enter the sewers; this is the same location where you get the equipment. When you meet several homonculus, use Mags Mell III, and your combo should shoot straight up to S+.

|
The Sonic Knight Perform a 30-hit combo |
|
|
You will need to get a full 30-hit combo without taking any damage. This can be done very easily against Trude and her 2 Ice Snakes during the boss fight. After knocking out the 2 snakes on her sides, Trude will come down to face you directly. At this point, hit her with all 4 spells and keep hitting her with melee attacks, and you should hit the 30 hits very quickly before she has a chance to retaliate. Another way to get this is with a large group of enemies and use Mag Mell's III, as the vines will be constantly attacking the enemies as well.

|
Take One for the Team Perform 10 counterattacks while taking enemy attacks |
|
|
This one is gained from any enemy that can grab you. There are two main enemies that can do this easily. The Wights can do this with their sword and you will have to mash to counter the enemy. The other main enemy that can do this easily (even easier than the Wights) is the Arachnid in the Tangled Castle. If you stand in front of the arachnid, it will eventually try to grab you and you will have to mash to break the hold.
to counter the enemy. The other main enemy that can do this easily (even easier than the Wights) is the Arachnid in the Tangled Castle. If you stand in front of the arachnid, it will eventually try to grab you and you will have to mash to break the hold.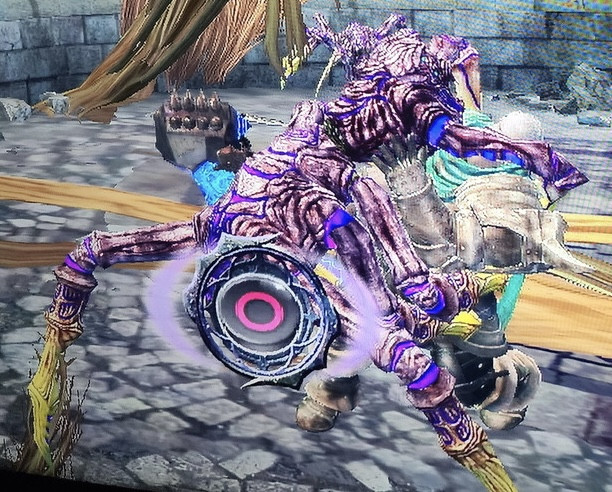 |

|
Ring Around the Rosie Catch and defeat five enemies at once with Mag Mell's Rose |
|
|
You will want to get Mag Mell's Rose II or III before attempting this, as it has a much wider range. After you have Mag Mell's Rose II or III, you just need to find a group of 5+ enemies and then use the magic when they are grouped together. While the Mag's Mell III makes it easier, it is not required; the main thing is to get a group close enough together for the magic to grab all 5. This can also be done at Level 1, though it can be more difficult.

|
Keeping Healthy Collect 100 Recovery Items |
|
|
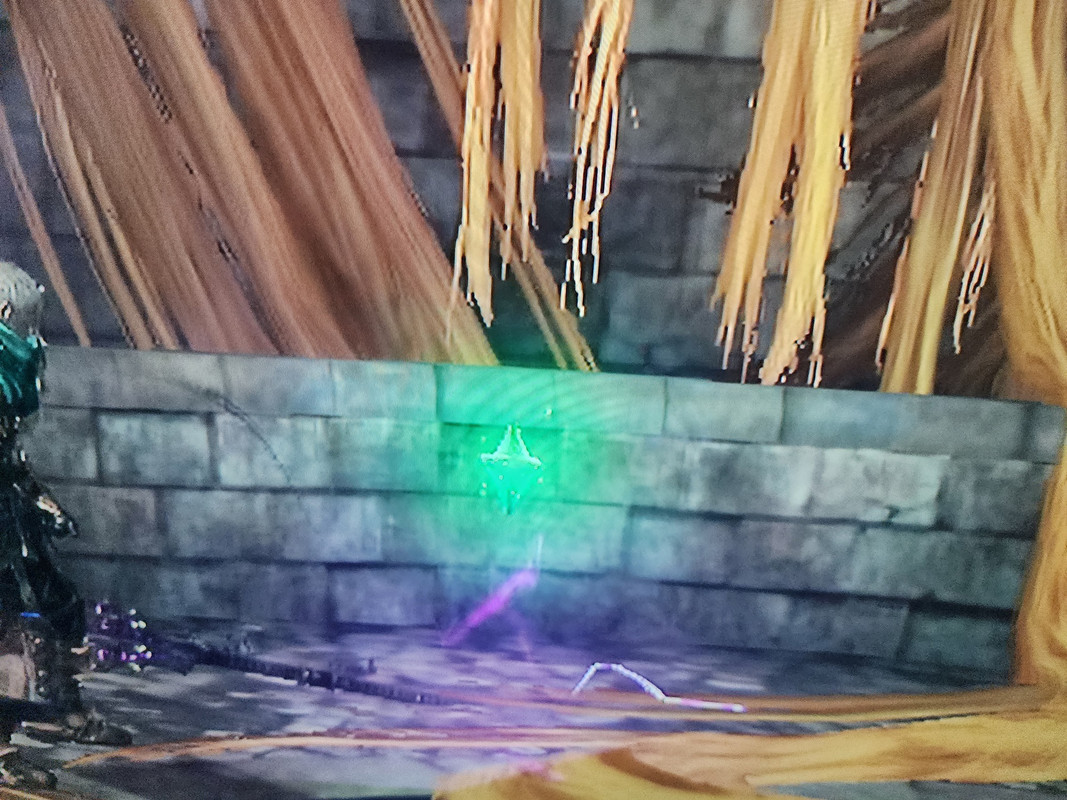
You will find recovery items after killing enemies and they will appear as Green Floating Crystals. Just grab every each one you see, and this should come naturally. Just like with Lost Pages, you have to get close to them, and they will then "fly" to you. You have to make sure Gretchen or Minukelsus get close enough for these to be absorbed, as only those 2 have a health bar to use these.
 |

|
Souls United Defeat 200 enemies with Knight's Fury |
|
|
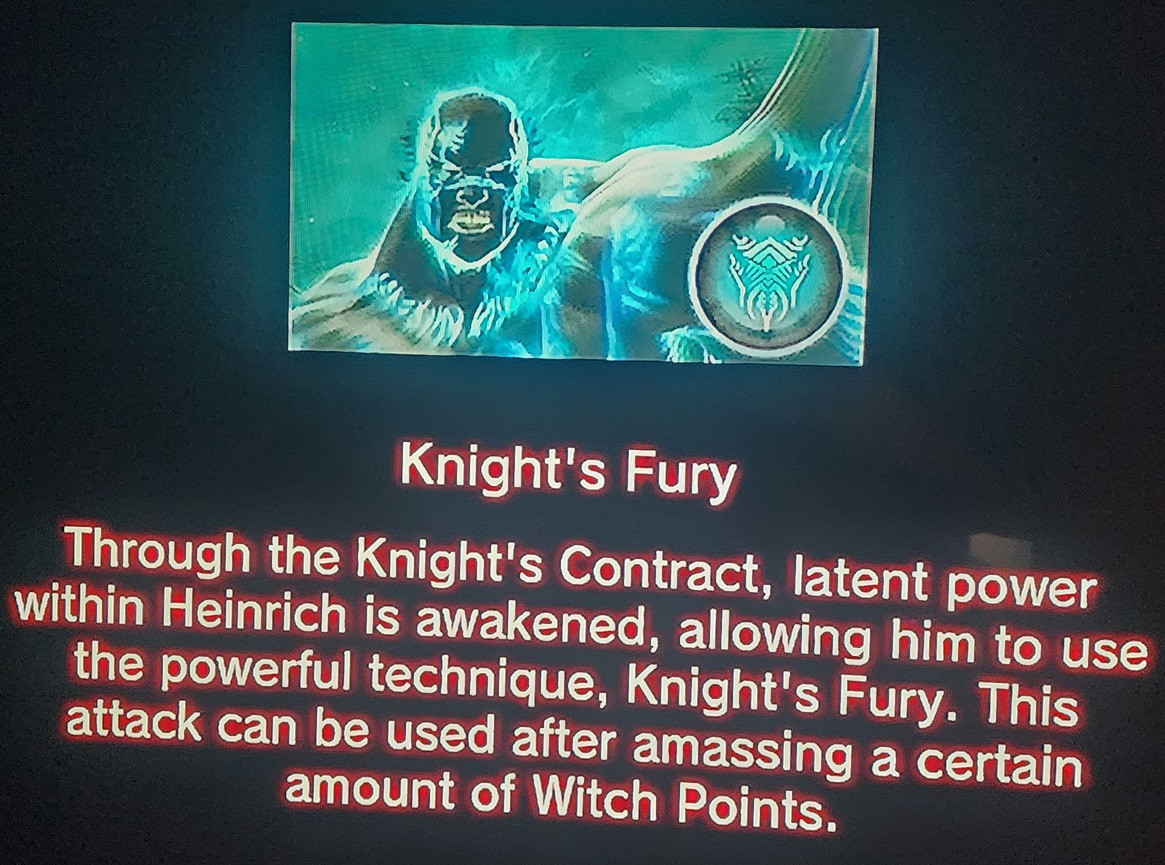
The Knight's Fury will be unlocked after you complete Episode 2: The Knight's Contract. This is similar to Dante's Devil Trigger mode, where you will take on a larger, more powerful form for a limited time by pressing  + or . If you gain enough Witch Points to use this towards the end of a fight, save it for the next fight or the boss. Make sure you use it when you can to cut down on grinding this one later.
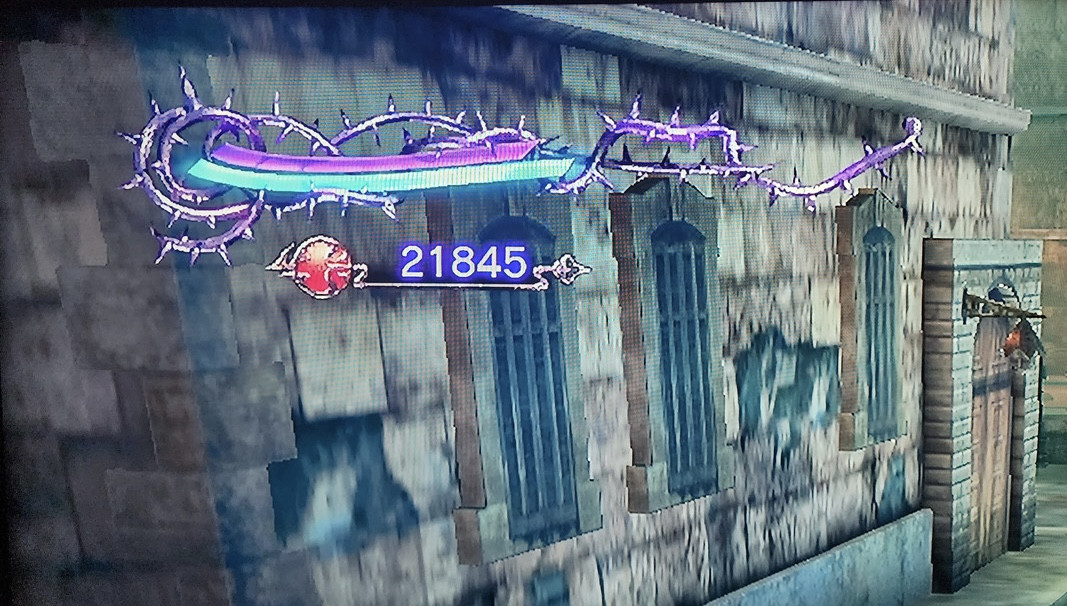
Both Knight's Fury and Witch's Embrace are charged by killing enemies and gaining Witch Points. The Blue Bar is for Witch's Embrace and Knight's Fury, while the Pink Bar is for Gretchen's & Minukelsus Health.
+ or . If you gain enough Witch Points to use this towards the end of a fight, save it for the next fight or the boss. Make sure you use it when you can to cut down on grinding this one later.Gretchen's Health Bar & the Witch Point Bar
 |
 |

|
Her True Strength Defeat 200 enemies with Witch's Embrace |
|
|
This is like Knight's Fury that you gain at the start of Episode 3 and this one is used by pressing + or . This is an area-of-effect attack that will either instantly kill all enemies or do massive damage depending on how strong the enemies are. If you use this on larger groups, it will not take too long for this one to pop. Just like Knight's Fury, it will use Witch Points. You get Witch Points from killing enemies, so this will more than likely come naturally, especially on the higher difficulties, as it can circumvent some of the more troublesome fights.
+ or . This is an area-of-effect attack that will either instantly kill all enemies or do massive damage depending on how strong the enemies are. If you use this on larger groups, it will not take too long for this one to pop. Just like Knight's Fury, it will use Witch Points. You get Witch Points from killing enemies, so this will more than likely come naturally, especially on the higher difficulties, as it can circumvent some of the more troublesome fights.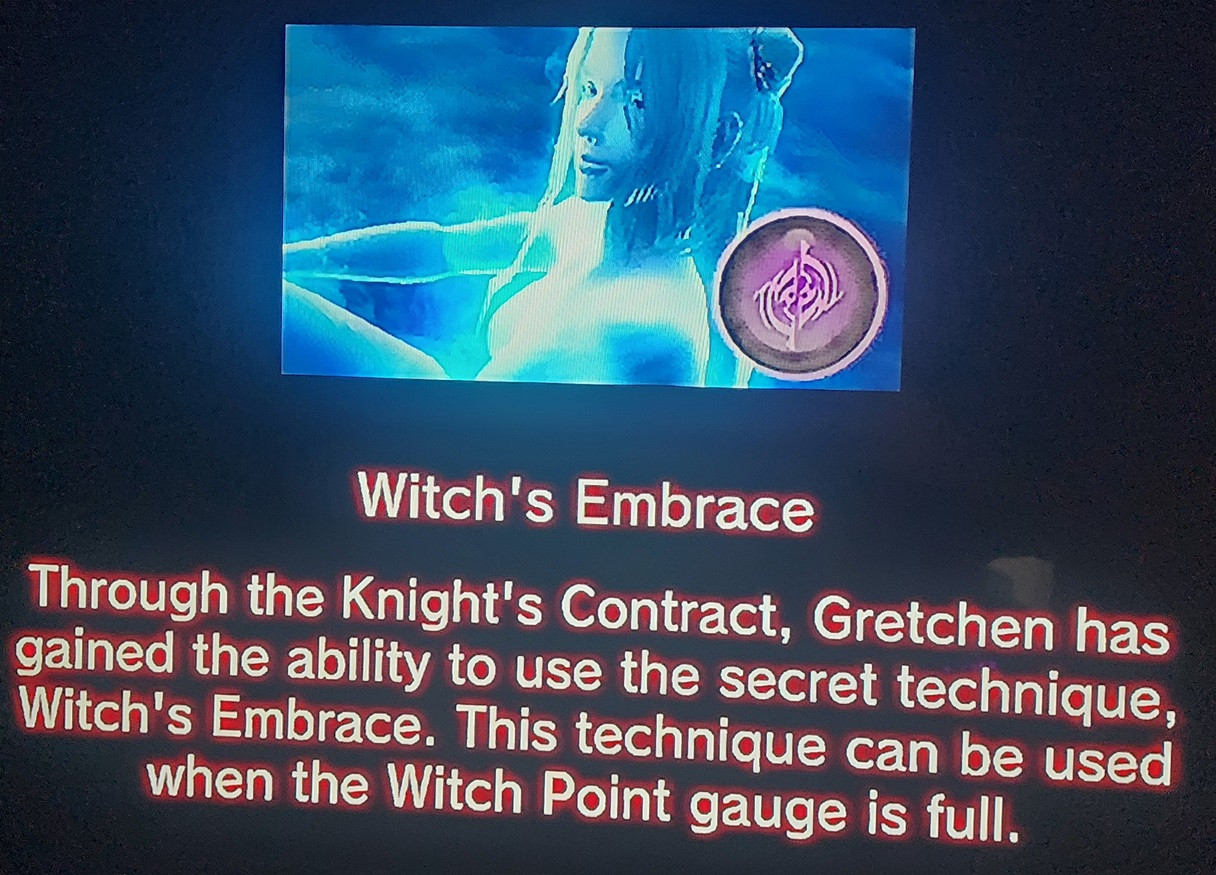 |

|
A Worthy Apprentice Defeat 50 enemies with the help of Minukelsus |
|
|
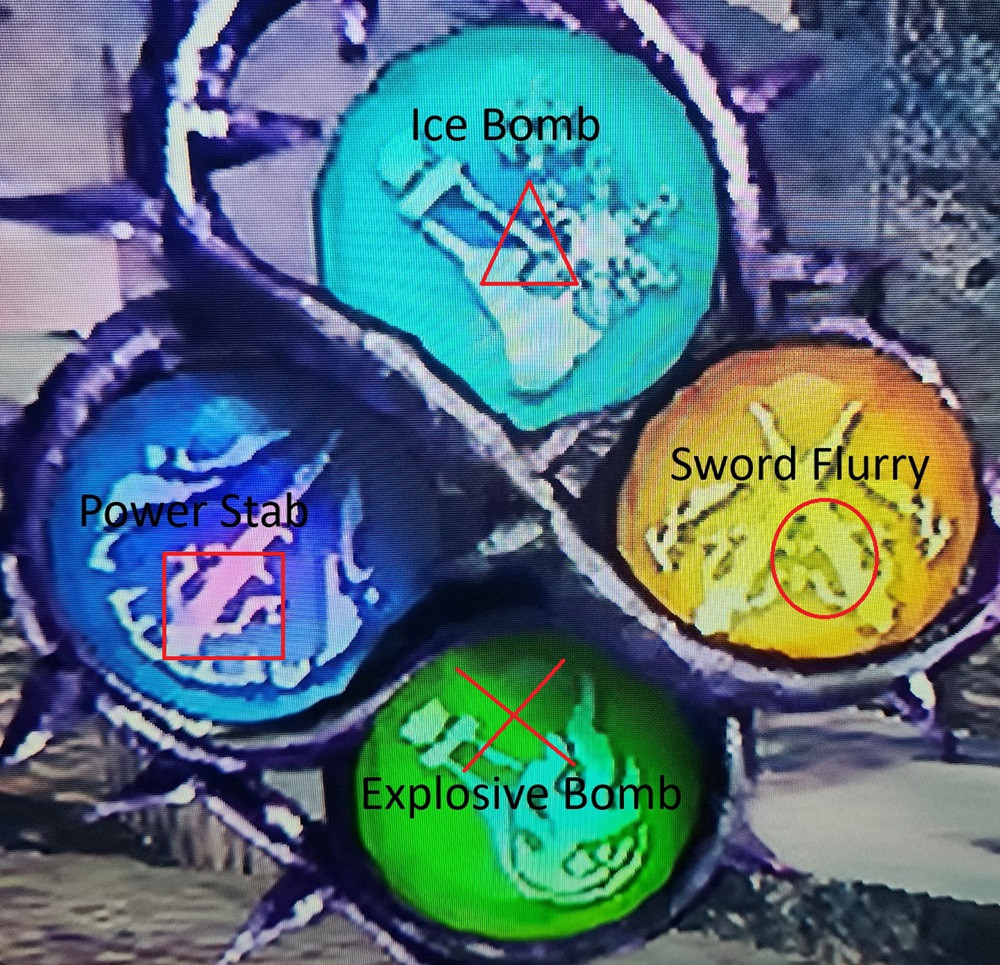
This can only be done in Episodes 12 and 14 as you will be separated from Gretchen. You can have Minukelsus attack the same way you use Magic by holding then pressing , , , or . The Power Stab is his strongest move and his Ice Bomb can freeze most enemies. Most enemies can be 1-HKOed with an Ice Bomb then a Power Stab especially in the lower difficulties.
The other 2 abilities can be helpful, but if you want to maximize damage, Freeze an enemy, then Power Stab for an Instant Kill. The equipment should also affect Minukelsus' abilities and recharge them faster. If you do not get all 50 kills before completing both Episodes, then reload Episode 12 from the Chapter Select.
then pressing , , , or . The Power Stab is his strongest move and his Ice Bomb can freeze most enemies. Most enemies can be 1-HKOed with an Ice Bomb then a Power Stab especially in the lower difficulties.The other 2 abilities can be helpful, but if you want to maximize damage, Freeze an enemy, then Power Stab for an Instant Kill. The equipment should also affect Minukelsus' abilities and recharge them faster. If you do not get all 50 kills before completing both Episodes, then reload Episode 12 from the Chapter Select.
 |

|
Growing Power Upgrade a Witchcraft |
|
|
You will need to infuse souls into one of the locked spells on your spell menu by holding . Once you get a new spell you will see a lock over the higher levels. Once you select the locked spell you will see how many souls it will cost to unlock that spell. Once you have enough souls you can unlock the spell and this one will pop.
. Once you get a new spell you will see a lock over the higher levels. Once you select the locked spell you will see how many souls it will cost to unlock that spell. Once you have enough souls you can unlock the spell and this one will pop.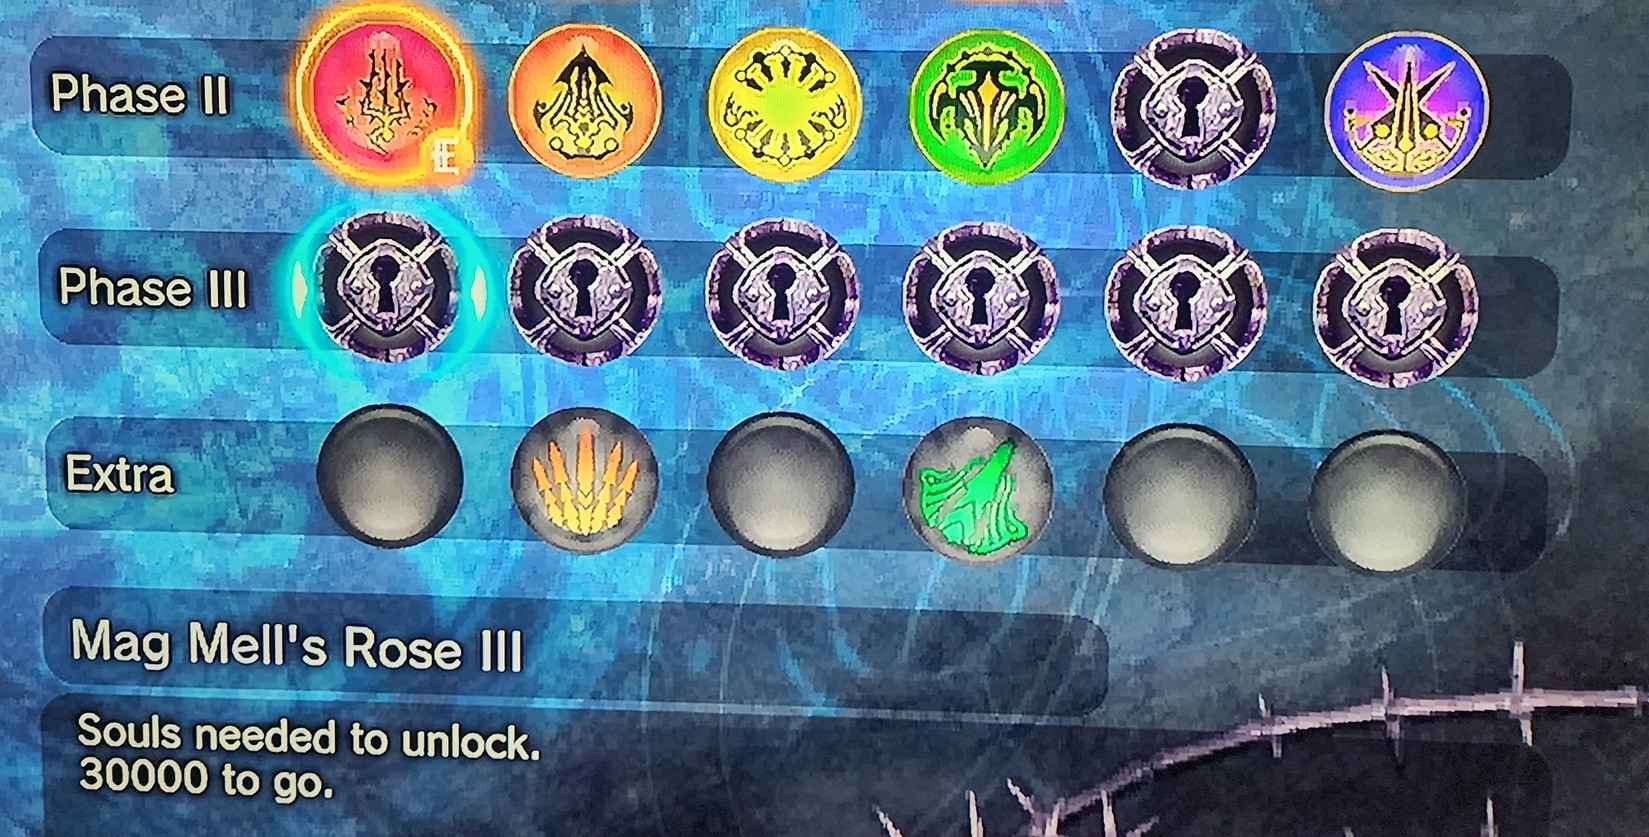 |

|
Witchcraft Collector Acquire all Witchcraft |
|
|
There are 4 Phases of magic to collect and each phase has 6 spells. The normal spells are gained through the story's progress, while the Extra spells are found in specific Episodes. You will need a total of 232,600 Souls to unlock every spell in the game. If you equip the Seal of the Hunter, that can speed this up a little bit. However, this will come naturally across the 3 required playthroughs, as you will easily get most of the souls needed in your first run. All of the Extra Spells are acquired at their max level.
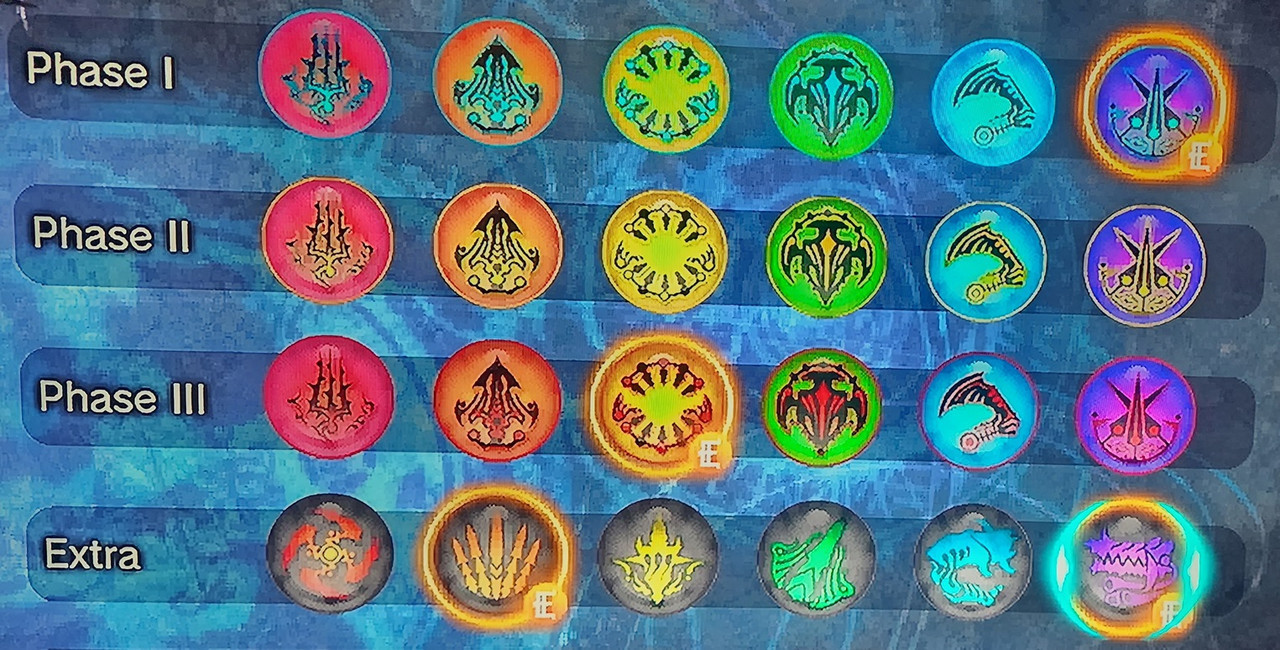 |
| Phase I | Phase II | Phase III | Extra |
|---|---|---|---|
| Mag Mell's Rose I Starting Magic | Mag Mell's Rose II 6000 Souls | Mag Mell's Rose III 30000 Souls | Tannhauser's Illusion Episode 6: After releasing the water that will allow you to reach the tower. Head into the sewers before climbing the steps to reach the tower. Follow the sewers until you find a ladder that leads to this spell. |
| Vlad's Impaler I Starting Magic | Vlad's Impaler II 5500 Souls | Vlad's Impaler III 36000 Souls | Elizabeth's Fangs Episode 13: After killing 3 electric phantoms at the start of the 3rd section, climb the vines to the area with this spell |
| Colchis' Trap I Beat Straeggele | Colchis' Trap II 7000 Souls | Colchis' Trap III 32000 Souls | Fafrotkies Rain Episode 15: After riding the elevator, there will be a hole you can drop down. After dropping down, follow the stairs to find this spell. The spell can be seen when riding the elevator. |
| Enoch's Hammer I Episode 3 Story | Enoch's Hammer II 5500 Souls | Enoch's Hammer III 35000 Souls | Hildebrand's Sword Episode 9: After saving Minukelsus in the Entangled Castle, it is on the 2nd floor balcony on the left side. |
| Halifax's Blade I Beat Trude | Halifax's Blade II 8000 Souls | Halifax's Blade III 32000 Souls | Kaspar's Rifle A-Rank Overall Difficulty Squire and Above |
| Maar's Lance I Episode 6 Story | Maar's Lance II 5600 Souls | Maar's Lance III 30000 Souls | Spirit Cannon The Witch's Ultimate Weapon |

|
The Finer Things Acquire all equipment |
|
|
| These are found all around the game world and appear as a green swirl and give different boosts. At the start, you can only equip 1 item until you receive the Witch's Testament. You get the Witch's Testament in the Tangeled Castle after you save Minukelsus. Then, you can equip 2 at a time, so choose the 2 that work best for your play style. | 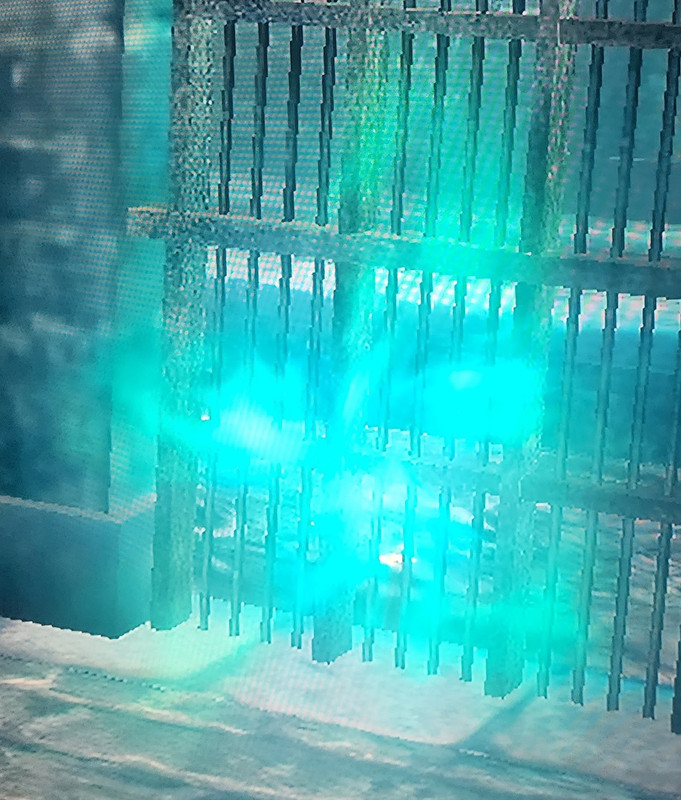 |
| Equipment | Location |
|---|---|
| Seal of Vitality | In Episode 3, you will need to climb a group of thorns near the end of the level to find this by a tree at the top of the cliff. |
| Seal of Life | In Episode 7, while climbing the tower to fight Holda. |
| Seal of Magic | In Episode 6, this one is hidden in the sewers past the lava just past the save point. You can reach this once you reach the save point after saving Minukelsus or wait until you get to the end of the stage. |
| Seal of Wisdom | In Episode 13. When you are in control of Gretchen, after entering the sewers, you will reach a "T" shaped intersection. Take the straight path, not the leg of the T, to find this at the dead end. |
| Seal of Rage | In Episode 13. After dropping down into the sewer, you will see the item directly ahead of you. Head left, then enter the maze to reach this item. Left, climb ladder, right, follow the path to next right, kill 4 enemies, and then head right to the item. |
| Seal of Souls | In Episode 15, inside a battle portal by the barrier. You will have to fight several phantoms to gain this item. |
| Seal of the Hunter | In Episode 10, while climbing the tower, in a room with 3 lightening sorcerers. This is the top of the tower, and the item is by the exit door. |
| Seal of the Bond | In Episode 4, from the save point, head to the left and then through the tunnel to reach this one. |
| Book of Unification | Granted to you once you beat Shadow Gretchen. |

|
Light Reading Acquire a collection item |
|
|
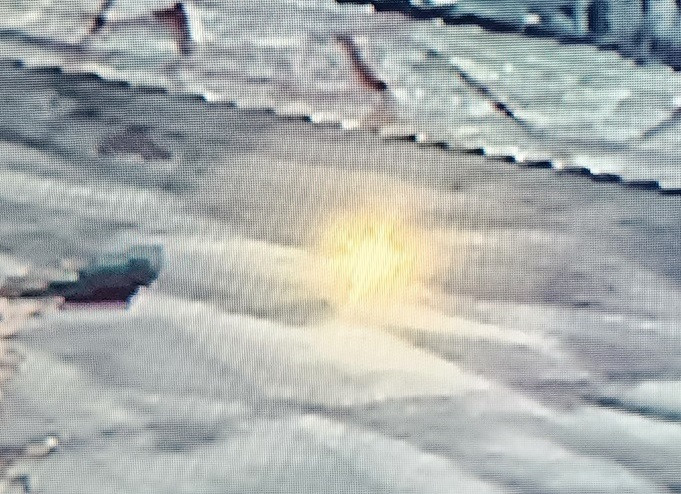
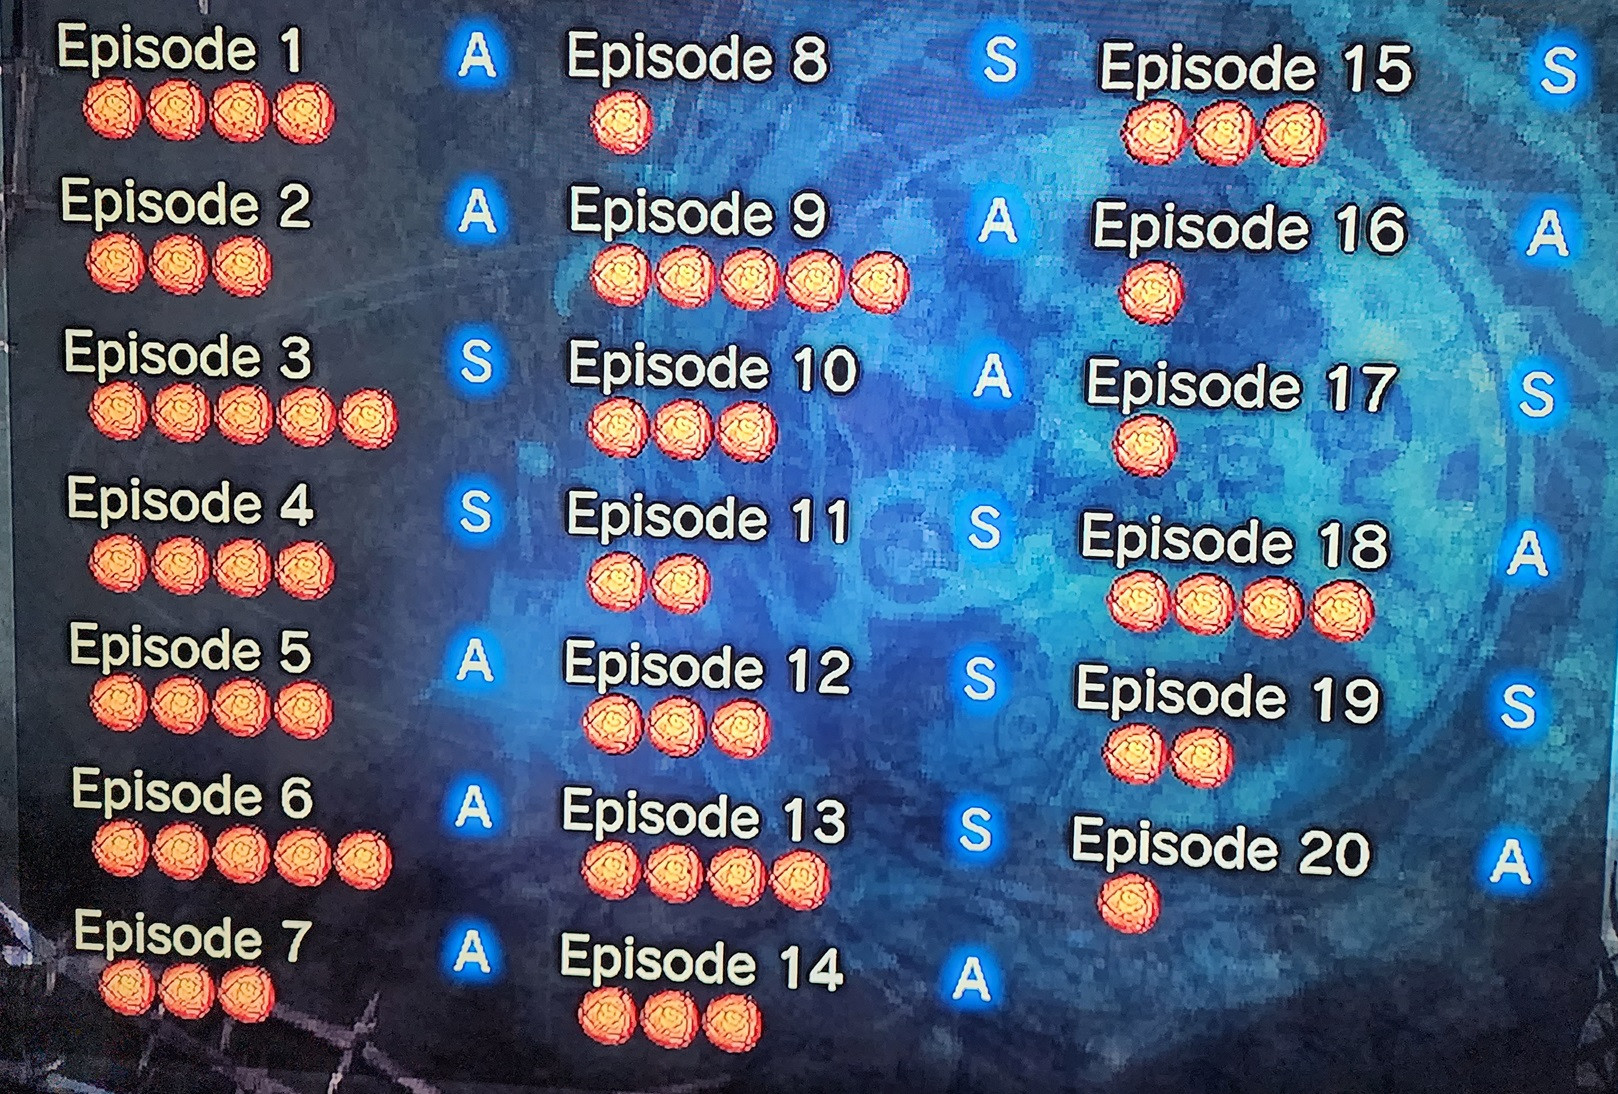
This one will pop once you collect a single Lost Page, several of which will be collected automatically. On the Episode select screen, these are seen as orange roses. See Information Junkie for a full list of lost pages and locations. Some of the pages cannot be missed, while others are hidden inside the environment. Also, the "roses" on the status screen include all 3 items: the Lost Pages, Equipment, and Spells.
Information Junkie for a full list of lost pages and locations. Some of the pages cannot be missed, while others are hidden inside the environment. Also, the "roses" on the status screen include all 3 items: the Lost Pages, Equipment, and Spells.| Item on the Map | Items on Results Screen |
|---|---|
 |  |

|
Information Junkie Acquire all collection items |
|
|
These appear as small glowing yellow/gold dots on the ground and they are all Lost Pages of your Grimoire. You can tell which ones you are missing on the Episode select screen, as they appear as orange balls/flowers on the right side of the screen.
Credit to Shoe478 for the collection items video guides.
Episode 1 - Death-Ridden Town
- After the first fight with the undead, head down the stairs. You will see four plants in the upper left corner. This page is inside the rock by these plants.
- Once you reach the first save point, head to the right of the save point.
- Pass the save point and enter the next area, from the door head to the immediate right to get this one.
- After the first fight with Straggele, return to the save point, where a group of thorns has appeared. Climb the thorns to find some barrels containing this page.
Episode 2 - The Knight's Contract
- While running from Straggele's monster form, stay to the left of the screen. You should grab this right before you have to turn.
- Once the boss fight starts, head to the right and break the carts to find this one.
- From where you start at the boss fight this one is forward and a bit to the left.
Episode 3 - The Frozen Forest
- To proceed along the path, you must break some large ice crystals. You will find this within those crystals.
- When you first meet the Dire wolves by a waterfall, you will see a blue trunk near the water. Break the trunk to find this lost page.
- You will be able to see this one after the bridge breaks. You will have to go around the long way to reach it. Head back to the waterfall and enter the cave behind it. Once you get through the cave, you will be able to reach this page.
- After getting the last page head forward to reach a thorn vine to climb. After climbing the thorns you can see a blue trunk to the left, break the trunk for this page.
Episode 4 - Finding the Ice Lord
- After the avalanche, head to the left and follow the path to the next right, and you will find this one by a small pool of water.
- Once you save Gretchen, head to the right of the log she was on. You can see a platform below you; drop down and enter the cave. Destroy the ice crystals to acquire this page.
- When you reach the save point, look left, and you should see a drop-off. Head to that spot, and you will fall; the page will be behind you. While you can reach this location sooner, the page is inside the ledge that breaks.
Episode 5 - The Serpent's Den
- This one is inside some logs in the tunnel by the first snake. As soon as you run off the snake, you can see the logs on the right.
- This one is in the arena of the second snake. The log is behind you inside a log. The snake is facing the log when it is in the arena.
- This one is dropped by the third serpent.
- This one is directly in front of Trude in the boss arena.
Epsiode 6 - A Town Ablaze
- When you lower the water to reach the sewers, you can see this one by the gate. Once you reach the sewers, head back up the canal to reach this one.
- After saving Minukelsus, you will be at a save point. Head straight, and you will see a door to the sewers. Enter that door, and when you reach the large room, you will see the page to the right.
- Shortly after draining the water for a 3rd time you will find aother door to the sewer, Gretchen will mention that you can reach the tower. Just run straight through this sewer, passing all turns, and you will find this one at the end of the tunnel.
Episode 7 - The Burning Tyrant
- In the back left corner at the start, behind the flame golem.
- On the rooftop during the first battle with Holda.
Episode 8 - He Who Desires Eternity
- To the left of the enemy pod.
Episode 9 - The Entangled Castle
- Follow the path until you meet the arachnids for the first time in a flooded room. From the entrance, take the second left, then go to the next left, and you will find this page. If you look at the map, it is in the lower right corner.
- From the previous page, head to the lower left exit and go to the room with four doors (counting the one you entered). Enter the north door (check the map if need be), then go to the left door and enter the kitchen. Go to the back of the kitchen and break the three Kegs to get this page.
- Once you are back outside you will fight a group of Wights, once they are dealt with you can open the barred door. Just outside the door, there will now be some vines you can climb. These vines were not here before, and the page is atop the platform
- Once you have saved Minukelsus, you can enter the large door, take the stairs down, and destroy the large cart to the left of the stairs to get this page. You can also unbar the door if you want.
Episode 10 - Furious Lightning
- In the arena where you fight Trendula in the first area there is a diamond platform, destroy the tree on that platform to find this page.
- When you reach the library, Trendula will punch a hole in the wall. The page will be to the left of the hole, due note that Trendula will puch through the hole occasionally.
- When you reach the room with 2 lightning phantoms and 8 statues, the last statue on the right by the exit has this page. Some of the statues are Wights, so they will attack you.
Episode 11 - To the Unforeseen Future
- This one will be dropped by the Gold Wight that you have to fight, make sure to pick it up.
- This one is in the arena where you fight Rapunzel. It should be near the center of the arena, but it can be very hard to see as it matches the hair.
Episode 12 - The Witch's Enclosure I
- Once you are inside the castle, follow the path until you reach the stairs. Now, follow the stairs all the way to the top to find this page.
- While still in the Castle section, you will reach the flooded room again. After killing the 2 Wights, head to the bottom right, and you will see the exit portal to the left and a path to the right. Take the right path up the stairs through the "L" corridor to find the page. You will have to kill all the enemies that appear to escape.
- When you are near the end of the episode you will be chased by a Gold Wight, you can kill him with Minukelsus or be chased. Near the end of the run you will find the page on the right side of the screen, this is right before a turn off.
Episode 13 - The Witch's Enclosure II
- Follow the starting path to the platform, which has a door to the right and 2 paths to the left. Take the lower path all the way until it ends to find this page. You will need to kill a few enemies along the way, so be careful.
Episode 14 - The Witch's Enclosure III
- In the arena with the Gold Wight by the bottom right pillar.
- Given to you automatically when you save Minukelsus.
- In the arena of the Shadow Gretchen boss fight, should be slightly to your right. This is the bottom left if you look at the map.
Episode 15 - The Witch's Enclosure IV
- In the Shadow Heinrich arena, in the lower right corner.
Episode 16 - Cutting Ties
- In the upper left corner of the map.
Episode 17 - Walpurgis Night
- After dropping to the save point, climb the vines out, then head to the south side of the map to get Gretchen to create some vines. Follow this path, careful not to fall when the screen transitions. Once the screen transitions, head to the left side of the screen to climb another set of vines and find this page.
Episode 18 - The Witches' Ruins
- Eventually you will get to a room with 3 doors, you enter through the north door, the right door leads to the Spirit Crystal and the left door leads to a room with 5 statues. You will want to head to the statue room and break the center statue to get this page, the other statues do come to life when you enter the room.
- In the room with the Gold Wight and his lackeys, this page is inside the center statue along the north wall.
- At one point, you will run from a large stone golem. As soon as the boulder ends the run, there will be a vine to the right. Climb the vines, both sets, and you will find this page at the top.
- Once you collect the third Spirit Crystal, head to the right, and you will find a group of statues. The page is in the center statue on the north wall, right before you can place the third crystal.
Episode 19 - An Old Score to Settle
- Behind you at the very start, where you fought the homunculus in the previous episode.
- In the center of the arena, during the fight with Faust.
Episode 20 - A Battle of Belief
- In the center of the arena after the First QTE.
Chapters 1 - 4 | Chapters 5 - 10 | ||
Chapters 11 - 15 | Chapters 16 - 20 | ||
Credit to Shoe478 for the collection items video guides.

|
Blood Spilled Defeat an enemy |
|
|
This will be the first trophy you will get as the first thing you have to do is kill a group of undead. After the cutscenes you will begin a fight with a bunch of undead, as soon as 1 of them is killed this will pop.

|
Blood Bath Defeat 100 enemies |
|
|
This will come naturally as you progress through the game, as you will be locked into rooms with groups of enemies that have to be killed. This will probably pop during Episode 3, around the time you start fighting the wolves.

|
Bloody Massacre Defeat 1,000 enemies |
|
|
Since you will have to do 3 playthroughs to obtain the platinum, this will come naturally due to all the fights that are required to progress. It does not matter if the enemies are killed by Scythe, Magic, Knight's Fury, or Witch's Embrace. Once you have killed 1000 enemies or bosses, this one will pop.

|
Executed Land a Finisher |
|
|

|
Skillfully Executed Land 100 Finishers |
|
|
Refer to Expertly Executed for details for this one.
Expertly Executed for details for this one.

|
Expertly Executed Land 1,000 Finishers |
|
|
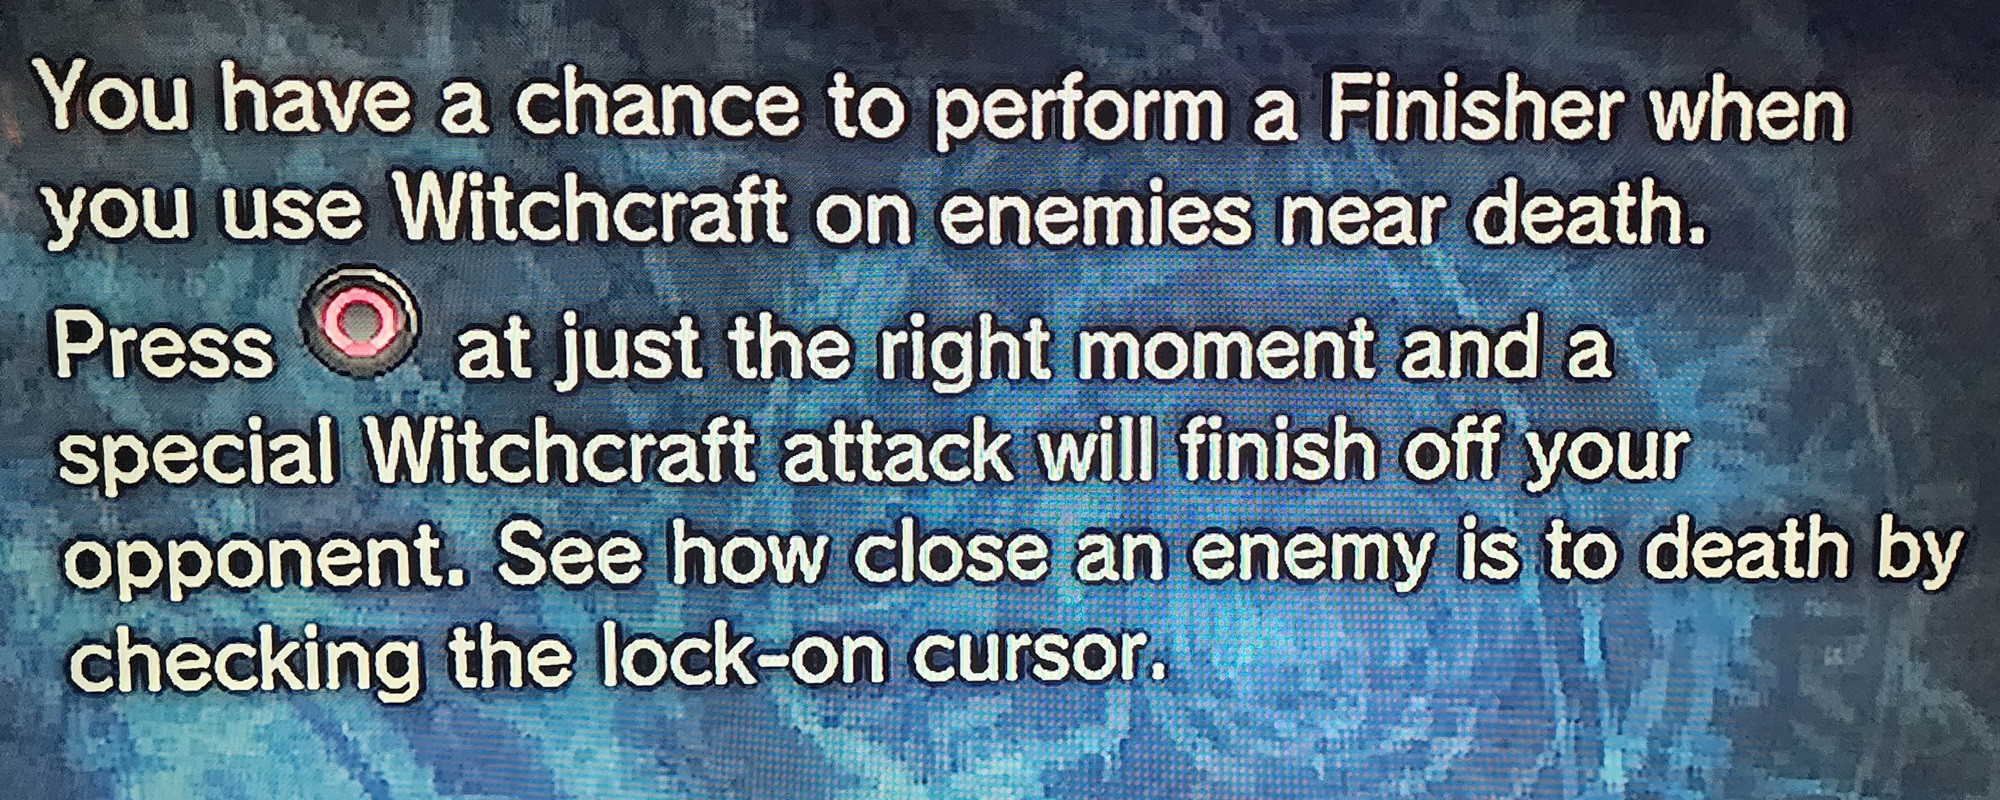
If you manage to do finishers, you can easily obtain this trophy before you complete the game. As Magic will be your main damage dealer throughout the game, this might come pretty early on. Make sure you hit the prompt every time you use Magic. Since you have to do three full playthroughs, this will probably come naturally.
 |

|
Elegantly Executed Land 100 Perfect Finishers |
|
|
There are certain magic spells that, once used on an enemy, a
prompt can appear. If you press at the right moment, you will perform a finisher. This can insta-kill an enemy if they are weak enough. If you get the timing right then it will become a Perfect finisher. Heinrich will glow blue when you land a perfect finisher.
prompt can appear. If you press at the right moment, you will perform a finisher. This can insta-kill an enemy if they are weak enough. If you get the timing right then it will become a Perfect finisher. Heinrich will glow blue when you land a perfect finisher.

|
Head Bangin' Bash the same enemy into a wall five times |
|
|
You will need to grab an enemy while standing near a wall using , then press to slam them into the nearest wall. A larger enemy on Knight or higher works best, so they have enough health to survive all 5 slams. If you are not next to the wall, then Heinrich will run with the enemy and then throw them. You can go for Get 'Em Up at the same time.
, then press to slam them into the nearest wall. A larger enemy on Knight or higher works best, so they have enough health to survive all 5 slams. If you are not next to the wall, then Heinrich will run with the enemy and then throw them. You can go for Get 'Em Up at the same time.

|
Get 'Em Up Pick up the same enemy five times |
|
|
This can be done at the same time as Head Bangin' as you will drop the enemy after slamming them into the wall. Just pick them back up again and repeat this 5 times. This can be done at any time as long as the enemy survives long enough to pick them up 5 times. It would be best to attempt this one Knight or above so the enemy has enough health to survive.
Head Bangin' as you will drop the enemy after slamming them into the wall. Just pick them back up again and repeat this 5 times. This can be done at any time as long as the enemy survives long enough to pick them up 5 times. It would be best to attempt this one Knight or above so the enemy has enough health to survive.

|
Nice Try! Repel an enemy's attack 10 times |
|
|
Repelling an attack is the equivalent of parrying in other games. When an enemy takes a swing at you, attack at the same time, and you will repel the attack. You can tell this is succeeded by a "clang" sound. Time will slow down, and both the enemy and Heinrich will take a step back. This does give you an opening to attack as well, for some added damage.

|
'Tis But a Scratch! Experience your first revival |
|
|
Refer to It's Just a Flesh Wound! for details on this one.
It's Just a Flesh Wound! for details on this one.

|
It's Just a Flesh Wound! Revive 50 times |
|
|
After taking a certain amount of damage, which differs based on difficulty, Heinrich will either explode or fall over. At this point you can rapidly press for Heinrich to rise back up on his feet. You will have to mash like crazy to revive Heinrich. On higher difficulties, this can mean a game over. If you do not revive fast enough, they will kill your partner. It is a bit more forgiving on the lower difficulties, just not much. Also, if Heinrich does explode, then you will get a QTE version of the revival. Having a Turbo controller can be very helpful in Hexen and Witchslayer.
for Heinrich to rise back up on his feet. You will have to mash like crazy to revive Heinrich. On higher difficulties, this can mean a game over. If you do not revive fast enough, they will kill your partner. It is a bit more forgiving on the lower difficulties, just not much. Also, if Heinrich does explode, then you will get a QTE version of the revival. Having a Turbo controller can be very helpful in Hexen and Witchslayer.

|
Bodyguard Save Gretchen from enemy attack |
|
|
During any fight, an enemy can grab Gretchen. When this happens, the screen will start flashing red. You will have to attack that enemy to get them to drop Gretchen; otherwise, they will kill her. During this time, you will also not be able to use magic, as Gretchen is the source of magic. This is basiclly the same as Take One for the Team, only Gretchen is the one being grabbed this time.
Take One for the Team, only Gretchen is the one being grabbed this time.

|
Guardian Knight Save Gretchen from enemy attack 50 times |
|
|
This should come naturally on higher difficulties. If you have not reached the 50 saves by the end of Witchslayer difficulty, then load a file near the start of the game. After meeting Gretchen, just let enemies grab her and then attack to save her.

|
Eye Candy Use Witch's Embrace when no enemies are present |
|
|
This can be done immediately in Episode 3 after the cut-scenes by pressing + or . You can then reload the checkpoint to restore your Witch points.
+ or . You can then reload the checkpoint to restore your Witch points.

|
I'm Taking You With Me Damage both yourself and an enemy with Witchcraft |
|
|
This can be done with most magics, however it is easiest with Clochis' Trap. Grab an enemy with , then cast Clochis' Trap, and you will damage both yourself and the enemy.
, then cast Clochis' Trap, and you will damage both yourself and the enemy.

|
Careful With That! Damage both yourself and an enemy with Witchcraft 10 times |
|
|
Refer to I'm Taking You With Me for details on this one.
I'm Taking You With Me for details on this one.

|
Touch Too Much Carry Gretchen around for a long time |
|
|
This is roughly two hours of cumulative carrying time, so you do not have to do it all at once. You can load a stage and just stand there carrying her while you watch a movie. Over the course of the play-throughs, you might reach this naturally; if not, some grinding could be required. The best thing to do is carry her when not in combat, and you should reach the time before completing the Witchslayer difficulty.
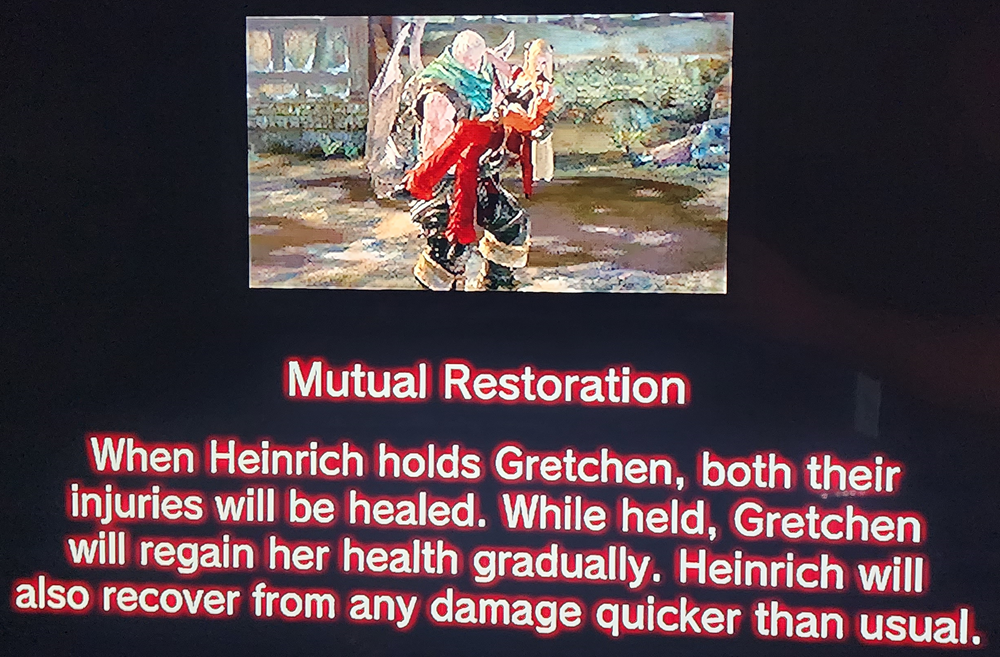
This also has the added benefit of recovering health while she is being carried. When in a boss fight, if the boss jumps off screen or out of range, it is a good idea to carry Gretchen to max out your health.
This also has the added benefit of recovering health while she is being carried. When in a boss fight, if the boss jumps off screen or out of range, it is a good idea to carry Gretchen to max out your health.
 |

|
PS3
|
|